How To Install Mods On Your Project Zomboid Server
If you’re looking to further customize your server outside of basic gameplay settings, modding is a fantastic way to do so. Here’s how to install mods on your Project Zomboid Server.
Getting Mod And Steam Workshop IDs
Section titled “Getting Mod And Steam Workshop IDs”You will need to know how to get a Workshop ID and Mod ID for each mod you want to install. You can view all the Project Zomboid mods here
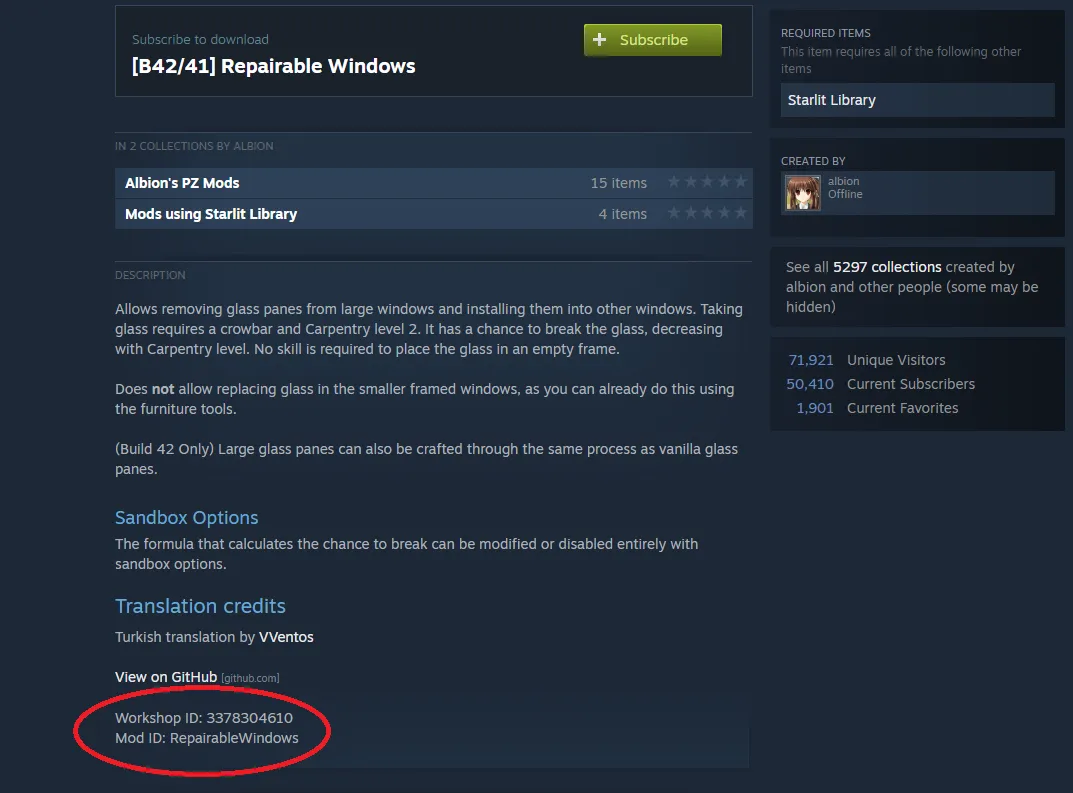
Once you find the mod you want you need to note the following. Let’s use this mod for example: https://steamcommunity.com/sharedfiles/filedetails/?id=3378304610

As you can see from the details at the bottom of the Steam Workshop page, this mod’s Workshop ID is 3378304610 with its Mod ID being RepairableWindows.
Installing Mods
Section titled “Installing Mods”- Access the Game Host Bros Game Panel and
Stopyour server. - In the sidebar go to
File Manager. - Navigate to and open
.cache/Server/pzserver.ini. - Add the Workshop ID to
WorkshopItems. - Add the Mod ID to
Mods. - Once finished, click save and start your server.
Here’s an example using these mods RepairableWindows and Water Goes Bad.
WorkshopItems=3378304610;2849467715Mods=RepairableWindows;WaterGoesBadB42 Multiplayer Modding
Section titled “B42 Multiplayer Modding”- Access the Game Host Bros Game Panel and
Stopyour server. - In the sidebar go to
File Manager. - Navigate to and open
.cache/Server/pzserver.ini. - Set
DoLuaChecksum=false. - Add the Workshop ID to
WorkshopItemsusing semicolons:WorkshopItems=3378304610;2849467715 - Add the Mod ID to
Modsusing backslashes and semicolons:Mods=\RepairableWindows;\WaterGoesBad;\LastMod - Click save and start your server.

